|
 Note on this
setup - this box has only slightly over 4" of space
for the length of the LiPo battery. There is also only 1" of
height, so anything thicker will require
modification. I did a simple mod to accommodate the 4S LiPo
I used for my primary. Note on this
setup - this box has only slightly over 4" of space
for the length of the LiPo battery. There is also only 1" of
height, so anything thicker will require
modification. I did a simple mod to accommodate the 4S LiPo
I used for my primary.
I purchased my 3S and 4S LiPos from
valuehobby.com. Both have T-connectors (Deans Ultra
compatible) and both have more than adequate power to start an OS-95
4-stroke with ease. The 3S (11.1V) doesn't seem
like it would have enough voltage to power a 12V starter
adequately, but it works fine due to the high power
density of the LiPo batteries. Thanks to Chris
Berardi from the SPA West for the tip on using the
3S LiPo. Here are links to the batteries I used.
3S --
http://www.valuehobby.com/power-systems/batteries/3s-lipo/elite-30c-2200mah-3s-t.html
4S --
http://www.valuehobby.com/power-systems/batteries/4s-lipo/elite-30c-2200mah-4s.html
|
| Here's my
spare starter in the original configuration (rear)
and my primary starter in V2 configuration (front). |
 |
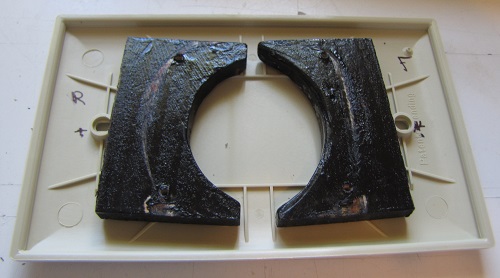
Here are
the parts I used for the conversion. Links, full
descriptions and part
numbers are provided above.
- CableHider 1-Gang Outlet Box - it comes as 2 pieces
(box & base) in a bag.
- Cover plate - color is optional if you plan
to paint it.
- UtiliTech 24" x ½" Cable Ties
- Starter uprights from original
version
- Paint of your choice. I used Gloss Black
Rustoleum Spray Paint because I had it on hand.
|
 |
The first order of business
is to disassemble the original, including removing
the uprights from the plastic box. The plastic box
may be reused as you see fit.
NOTE: If you are starting
from scratch, see V1 article for instructions and materials to make the uprights.(https://seniorpattern.com/build_tips_starter_box.html)
Mark the
cover plate for the uprights and drill appropriate
holes for the screws to hold them in place. I located them
on the flat area just
outside the cover plate screws and used only 1 screw
to hold each of them in place. Use what makes you
comfortable, but remember that the entire starter,
upright and box will be wrapped with a 1/2" wide
cable tie. |
 |
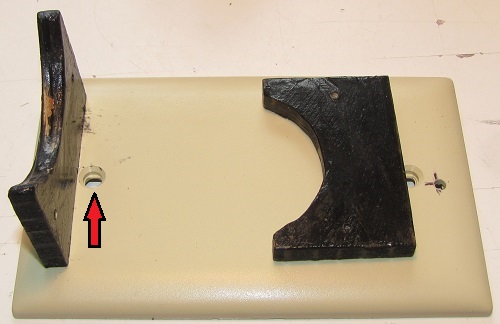
Screw the uprights to the
cover, keeping them parallel with the end of the
cover. Here's one upright mounted and the other with
the hole drilled.
CAUTION: Be sure to locate the
uprights far enough toward the ends of the cover
plate so it can be screwed to the box after the
uprights are mounted. The uprights needs to be
mounted so the entire countersunk area for the screw
head is visible. See
RED arrow. |
 |
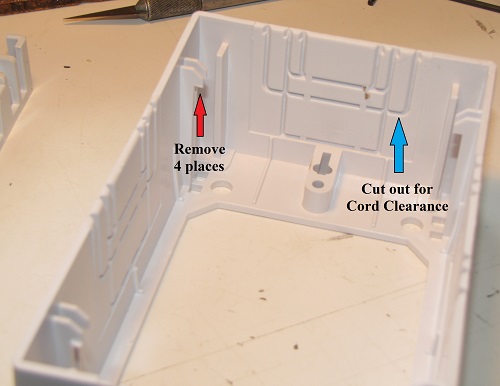
Now for
several slight modifications to the box.
Mod #1 (RED
arrow): The box has tabs to hold the box
tightly to the base when mounted to the wall. We don't need them because we'll be wrapping the
entire box with the big cable ties. Besides, we want
to be able to take the box apart if the LiPo battery
ever needs replacement, so get rid of them.
Sandpaper, a file, a Dremel cutoff wheel or even an
Xacto knife will do
the job just fine.
Mod #2 (BLUE
arrow): Cut out a slot in the end of the box by following one of the
lines molded into the
inside of the box. This is where your battery wiring
will exit the box to attach to the starter. Locate
it slightly off center so you can center your battery in the
box and have the wires come straight out without a
bend. Clean up any sharp edges. |
 |
|
Screw on the cover plate and then do
ONE
of these two mods below depending on the battery you
choose.
Mod #3A - if your battery is less than 1" thick
such as the 3S LiPo above.
- Use your Dremel with a cutoff wheel to cut
off the excess screw that protrudes through the
box material. This will keep the screw from
accidentally penetrating the LiPo - NOT a good
thing. See
RED arrow for location
and do this on both ends of the box.
Mod #3B - if your battery is more than 1"such as the
4S LiPo above.
- Use your Dremel with a cutoff wheel to cut
through the plastic and the screw on both ends
of the box to get
clearance for your battery. See
BLUE arrow for
location. I had to remove about ¼" for the 4S
above. Don't worry - there's still plenty of
meat to hold everything together.
|
 |
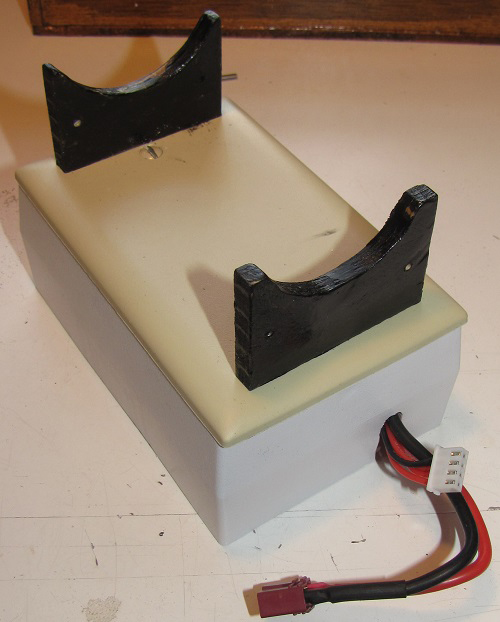
| That's it - the building is done. Here's the assembled
box with the battery temporarily installed. |
 |
|
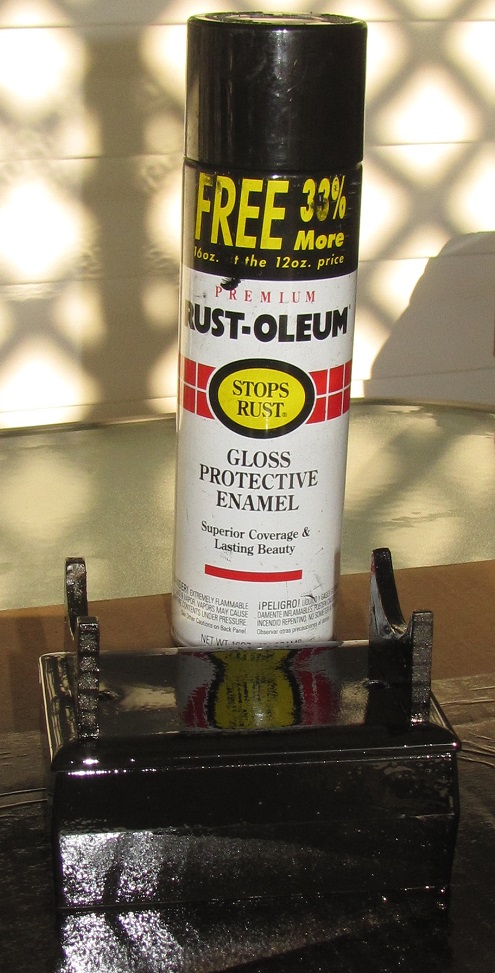
Remove the battery and paint the visible area of the
box the color of your choice to
complement or contrast with your starter. I didn't bother painting
the bottom since it won't be seen in normal use, but
you can do so if you like. Let it dry
THOROUGHLY! I used Rustoleum Gloss Black
because I had it on hand from another project.
Rustoleum requires 24 hours to
dry completely. |
 |
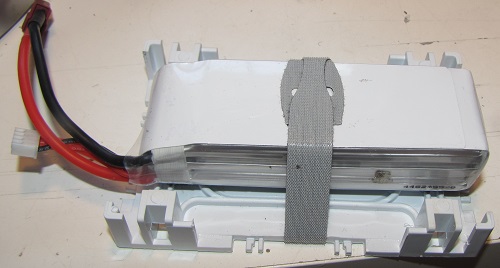
| Pad you battery - I used ¼"
foam rubber on the 4S version and stick-on Velcro on
this one with the 3S LiPo. I also used a small Velcro strap to hold
the battery firmly in place. |
 |
| Slip the base into the box with both
the power and balance leads
protruding through the slot you made in Mod #2.
Place the box on the base and press them together. You may need to press the
four posts protruding from the base sideways to get
them to fit into the box properly. Take your time. |
 |
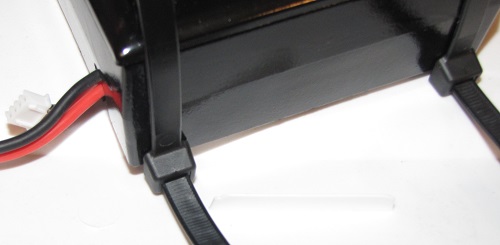
Put a couple drops of
Medium CA on the top of each upright where it
contacts the starter. The starter can actually
rotate on the uprights if you don't do this.
Mount your starter using
the 24" x ½" cable ties around the starter,
uprights and the box itself. Align the
starter switch in the location YOU
prefer. I like mine on the left side where I can
activate it with my right thumb. Put the cable tie
locks at the bottom of one side of the box. This is
a square corner anyway, so it's one less place to
create slack in the cable ties.
Tighten the cable ties as tight
as you can get them - I used pliers to help. I
then cut the ends off, leaving about 3" of excess. I
laid the starter out in the sun, let it soften the
wire ties, then pulled them as tight as possible and cut them off flush. |
 |
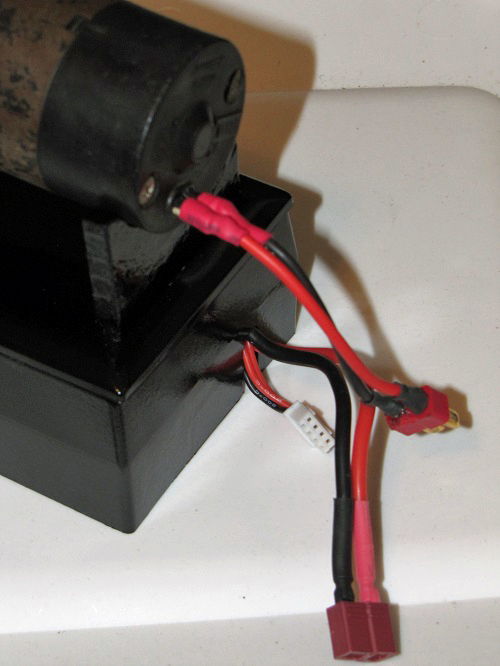
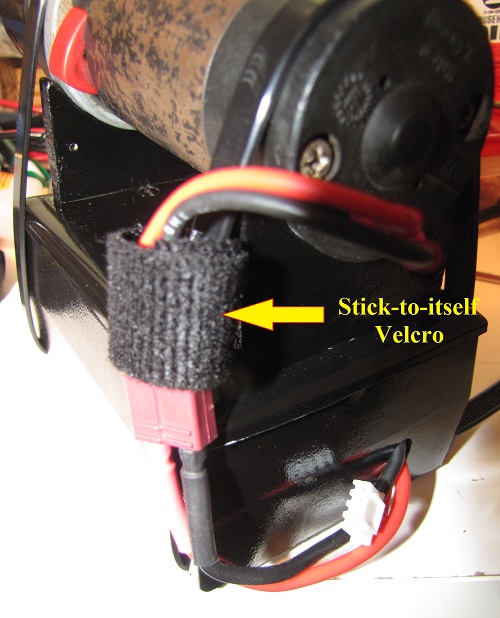
I used a short strip of
double sided stick-to-itself Velcro wrapped around
the power wires and the rear cable tie to keep the
excess wiring out of the way.
NOTE:
That little white XH Molex balance plug is
somewhat fragile, so protect it. Notice that I
tucked it between the power wires for safety. You'll need it to
balance charge the LiPo without removing it from the
case. |
 |
Here's my backup starter in V2 configuration.
All that's left to do is the final tightening of the
cable ties and cutting off the excess. I now have two great starters to use and
share with friends who might need one.
You can add stick-on feet to the bottom if you'd
like, but I haven't felt the need to do so. |
 |
|
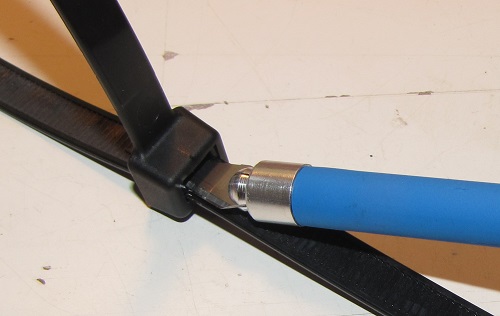
TECH TIP
Have you ever over
tightened a wire tie so that it's too small for the
task at hand? Me too - frustrating, isn't it? It is
especially annoying with these long, wide cable ties
because they are about 50¢ each due to their size.
Simply slip a #11 Xacto blade BETWEEN the lock and the
clicking surface of the wire tie. Then you can
easily open the wire tie to a larger size.
|
 |